Our hips are the large joints that connect our legs to the rest of our body. We can squat, stand, jump and run when our hip joints work well.
In older people, the most common problem arising in the hips is Osteoarthritis, which affects about 10,000 people in the Klang Valley each year, and is one of the main reasons for hip surgery.
But pain in the hip can also affect the young and athletic. Pulled groin muscles, tears of the Labrum (the soft cartilage that keeps the ball and socket of the hip in place), fractures, and swollen and inflamed joint linings (technically called Bursae) can all cause pain – and limit function.
Whatever the cause of hip pain, the strong muscles surrounding the hips and buttocks can help support your painful hip, and get you active again as soon as possible.
Here are 9 useful exercises you can do at home today to strengthen your hips.
They are specifically designed for patients with hip arthritis and Labrum injuries, but as they are really simple, everyone in the family can join in.
Note: Some of these exercises use resistance exercise bands – which are a type of elastic band that you can find in most supermarkets or pharmacies. If you don’t have a resistance band now, don’t worry, you can start doing the exercises without the bands, and add the band on later.
.
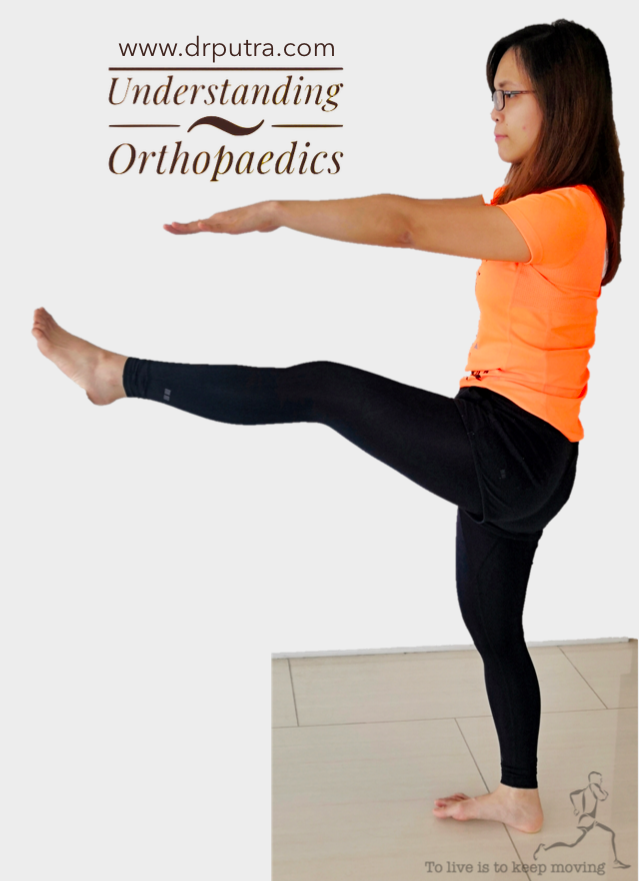
1. Circling Your Hips (Alternatively The Hip Pendulum Exercise)
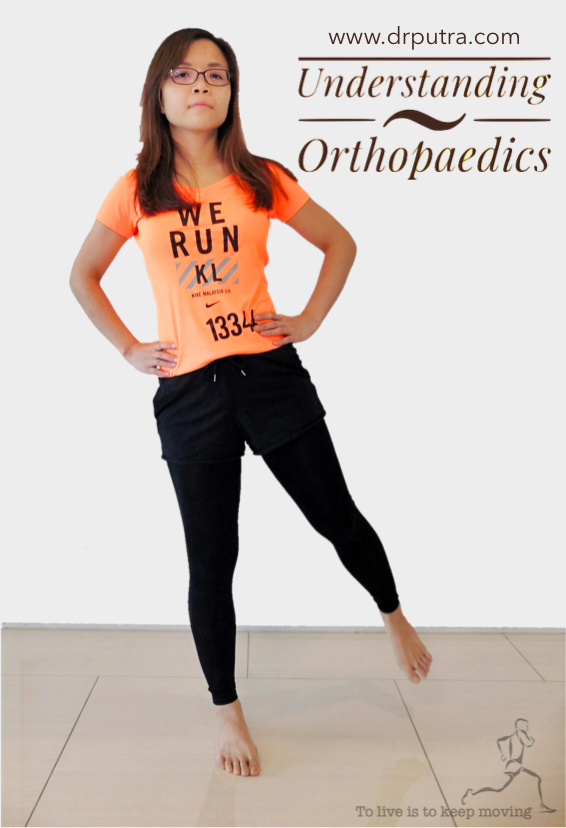
Stand up straight and lift your left leg forward and a little outward like in the picture.
Move your left leg in circles , first clockwise 20 times , then anticlockwise 20 times.
Change legs and repeat. Aim to do 2-3 sets each day.
Note: You can hold on to a chair or table to keep you stable while doing this exercise
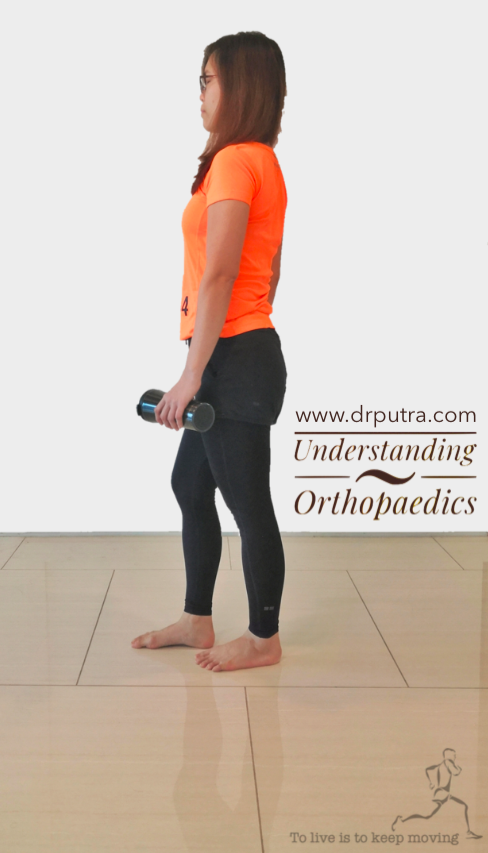
2. The Monster Walk (Alternatively The Frankenstein Walk)
Stand straight with your arms stretched in front of you, palms facing the floor.
Walk straight ahead, swinging your each leg up as high as you can. It’s okay if you can’t touch your arms/hands with your feet, just go as high as possible.
Continue the Monster Walk for 1 minute.
As you get better, try to increase the number of steps you can do in 1 minute.
Note: You may need to do this outside, or somewhere where you have more space to move around. Make sure you wear shoes with a good grip on the floor if it’s slippery.
3. The Flamingo Dance (Alternatively Single-Leg Romanian Deadlifts)
Stand straight on your right foot with your knee slightly bent. Hold a small dumb bell or weight in your left hand.
Slowly bend forward, bringing your chest and torso parallel to the floor, and lift your left leg off the floor, like in the picture.
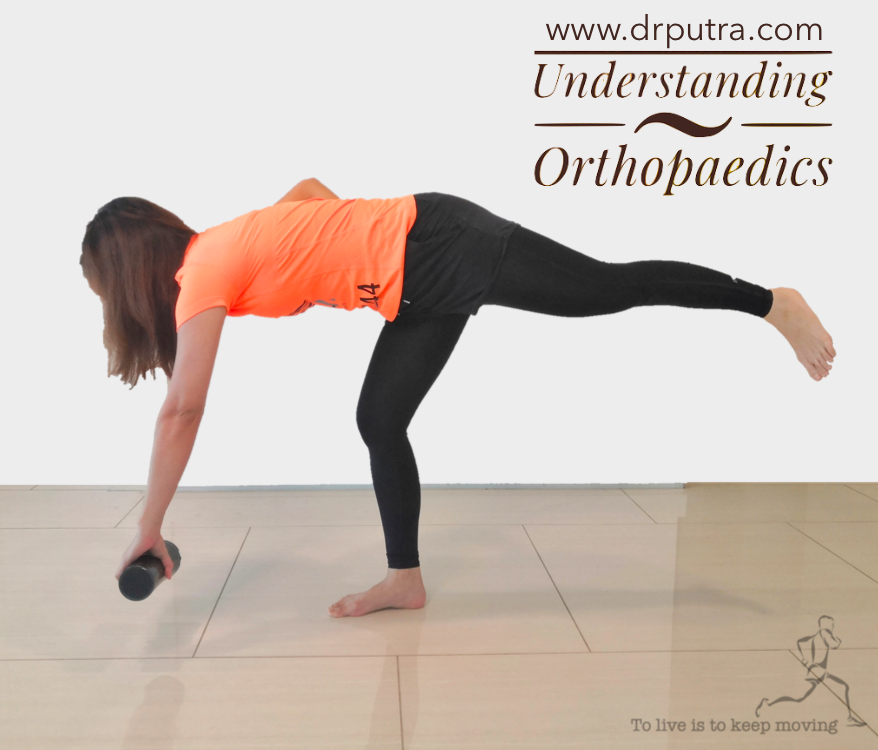
Hold for 5 seconds, then come back up to a standing position and lower your left leg.
Repeat this 10 times, then switch sides. Aim to do 2-3 sets each day.
Note: If you don’t have a weight, you can use a small mineral water (or similar sized) bottle filled with water… or you can just do the exercise by itself without any weight.
4. The Little Mermaid (Alternatively The Clamshell Exercise)
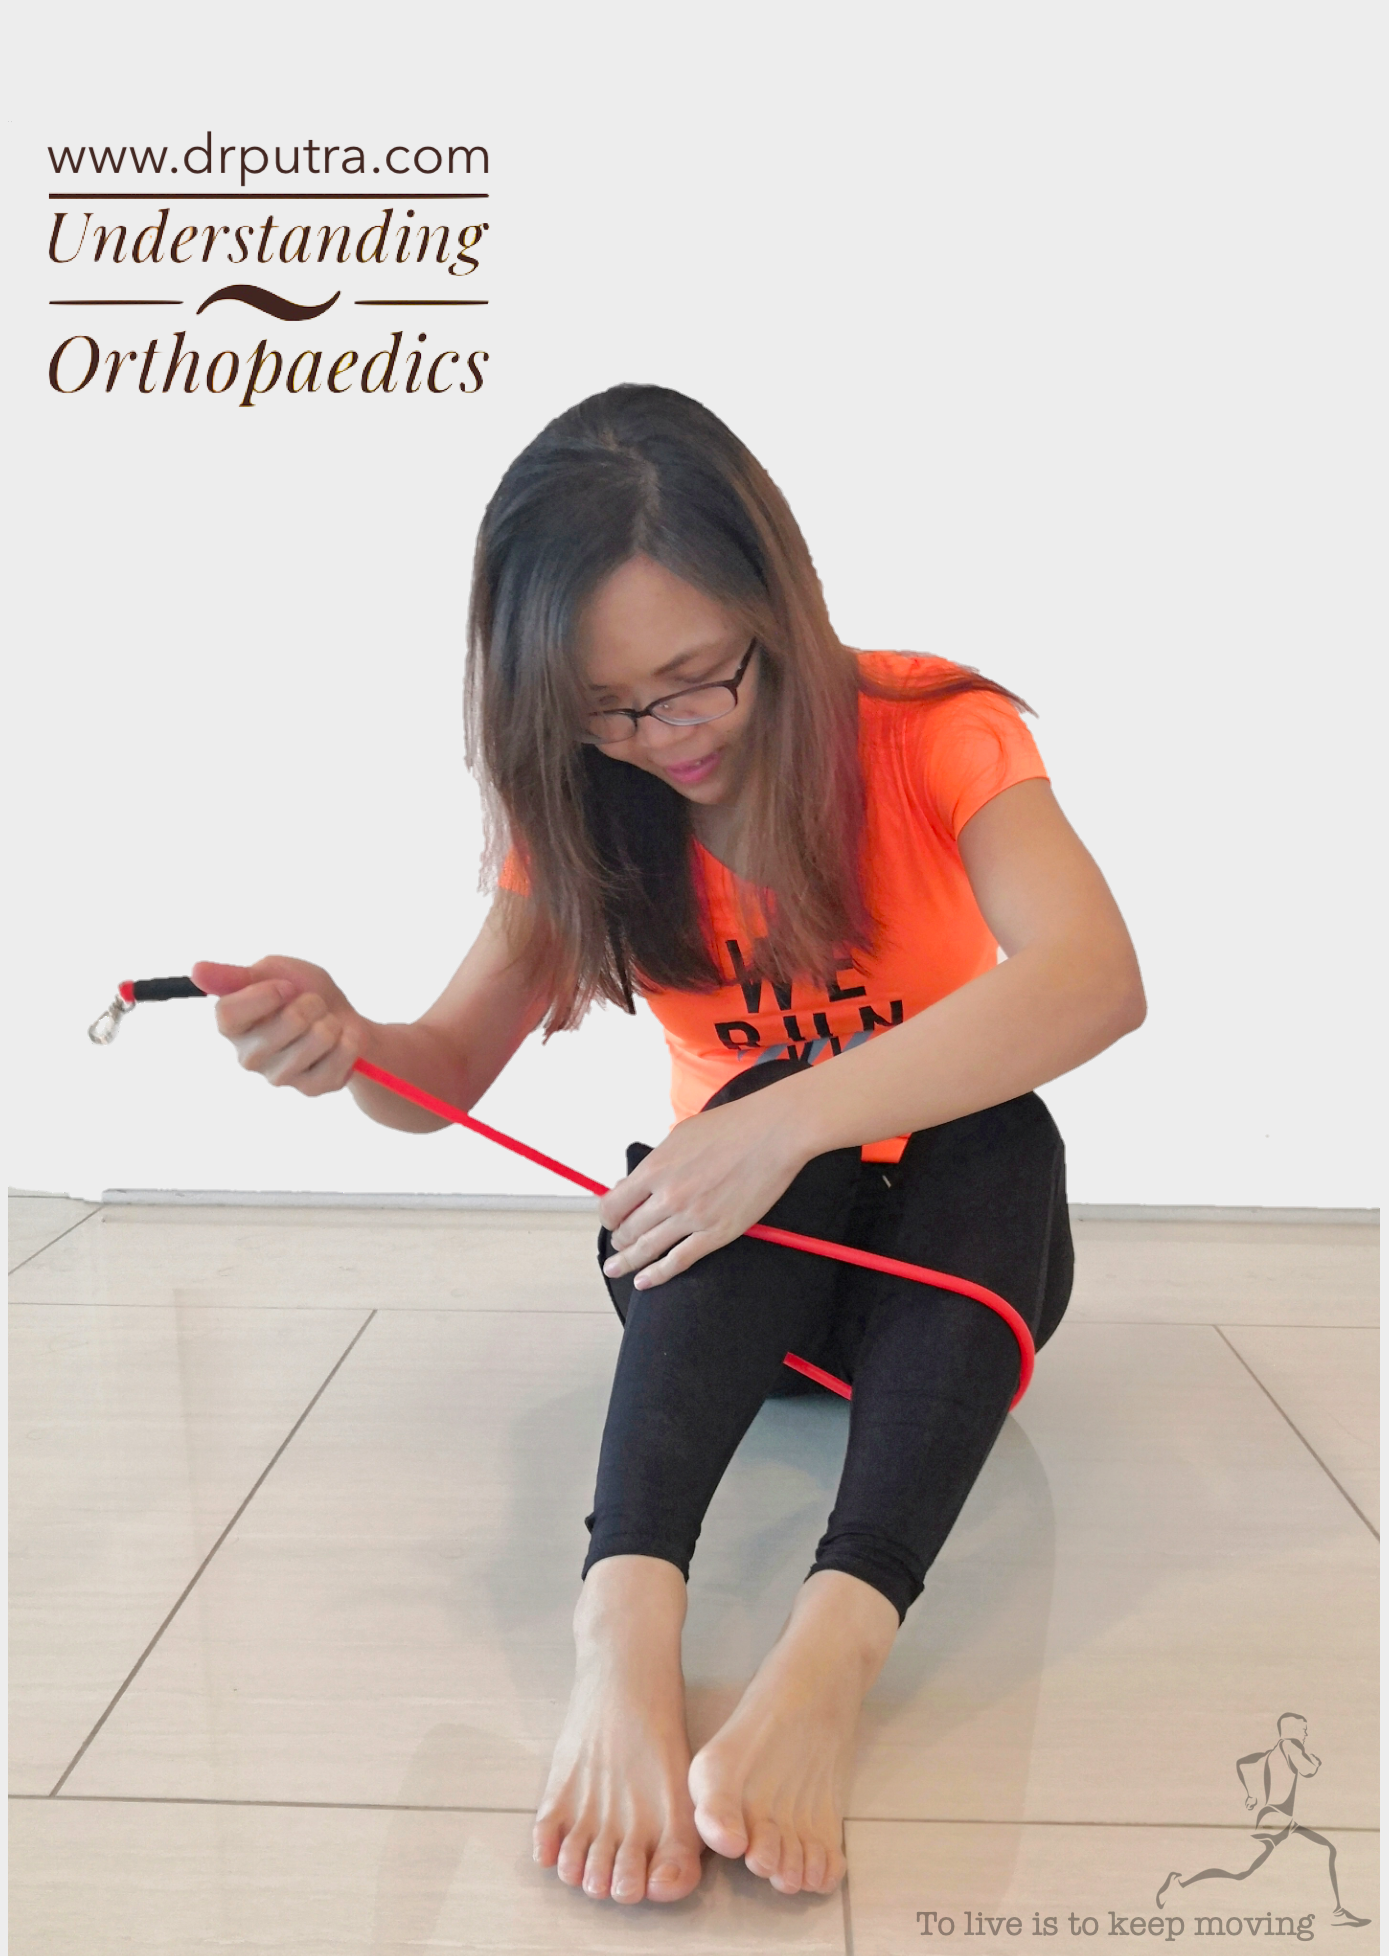
Lie on your right side with your knees bent and an elastic resistance band looped around your lower thighs.
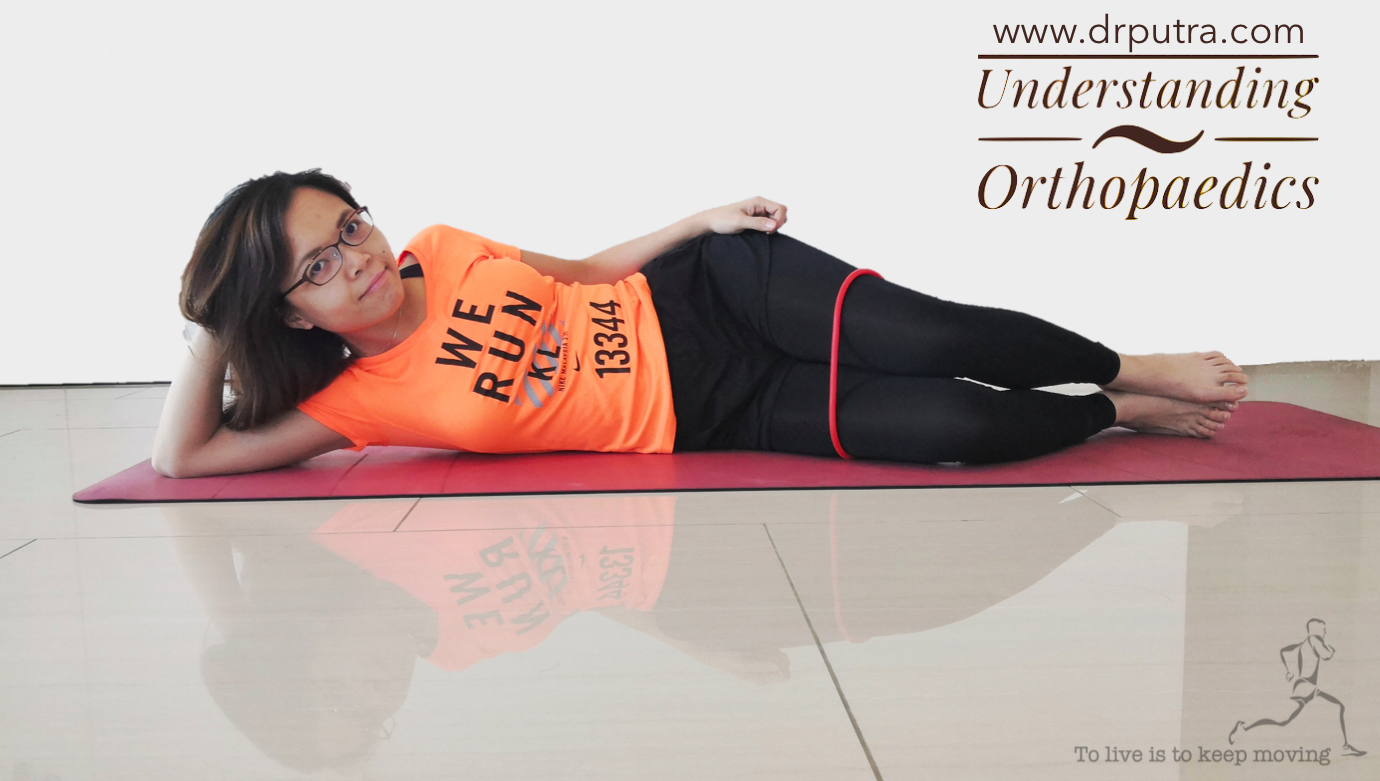
Rotate your top (left) leg up as high as you can, and hold for 3 seconds. Then lower your top leg back to the starting position.
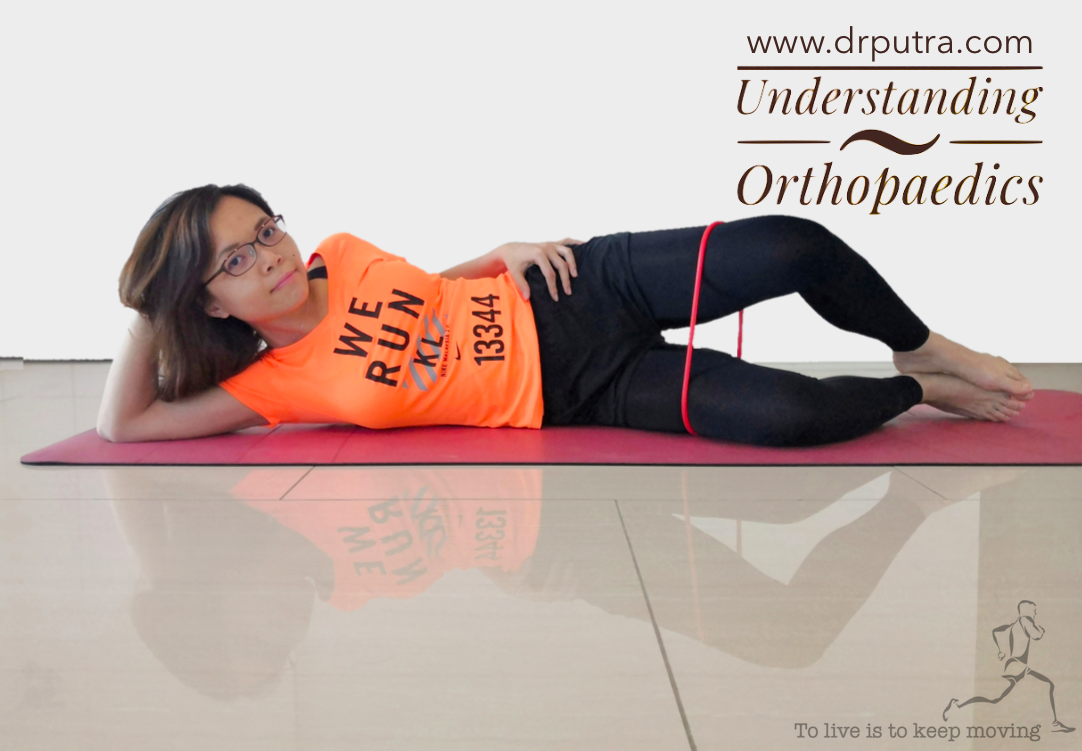
Repeat this 10 times, then turn over and lie on your left side and do the same with your right leg. Aim to do 2-3 sets each day.
Note: If you don’t have a resistance band, just do the exercise without one.
5. Mouth of The Crocodile (Alternatively Side Leg Raises)
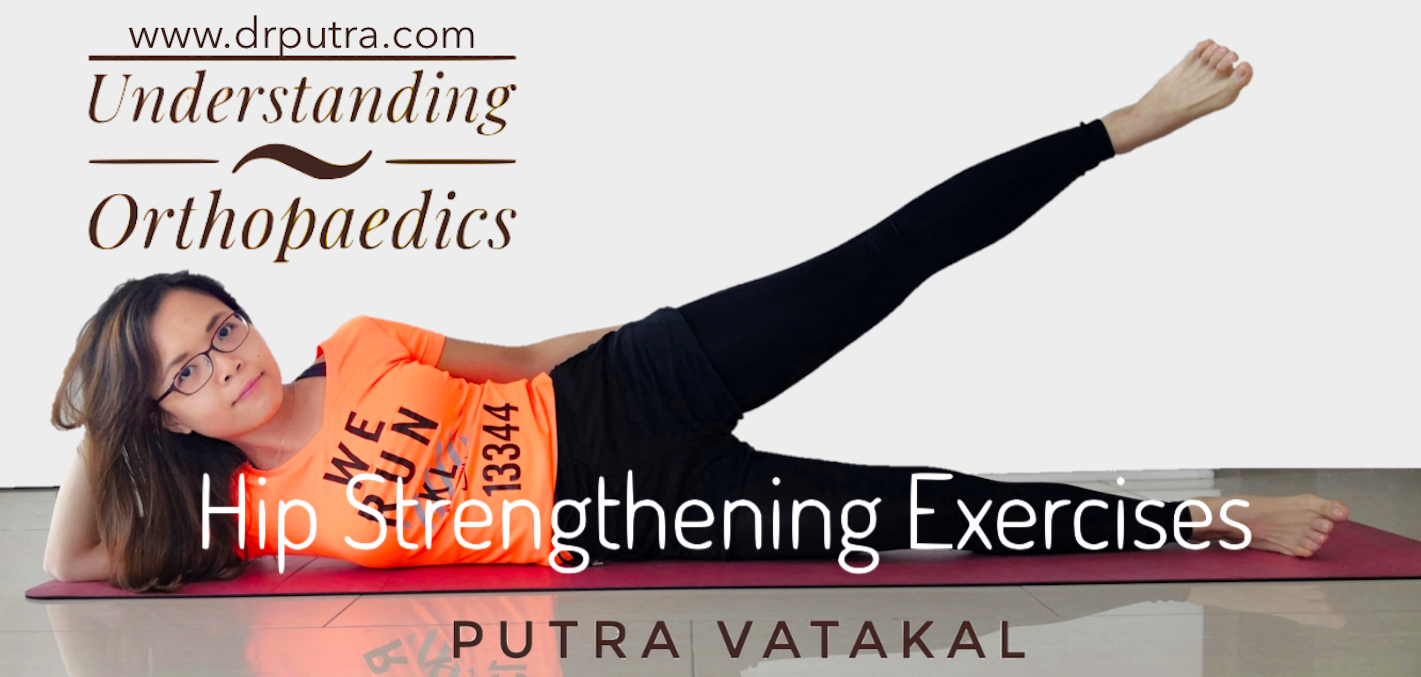
Lie on your right side with both your legs straight as in the picture.
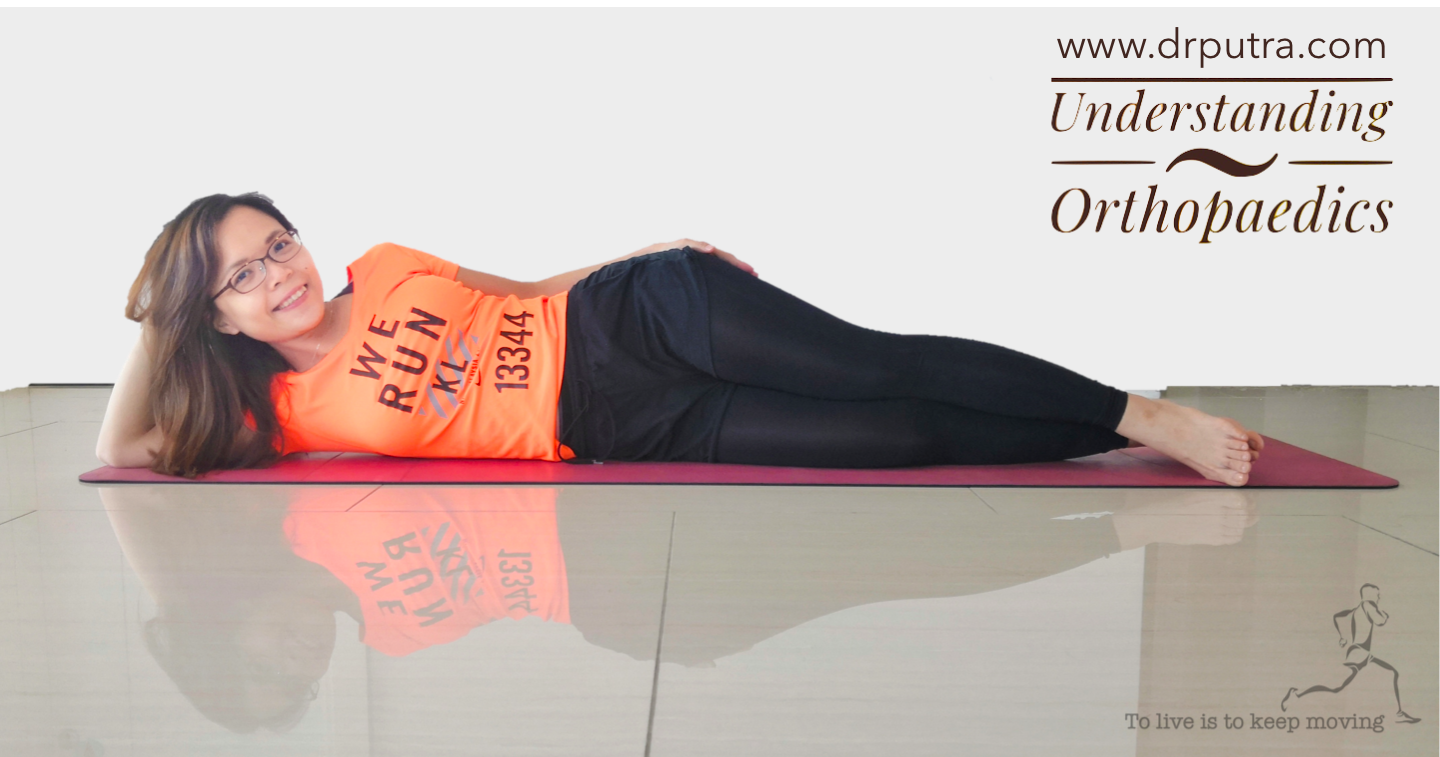
Raise your left leg as high as you can, keeping your knee straight. Hold and count to 3, then return to the starting position.
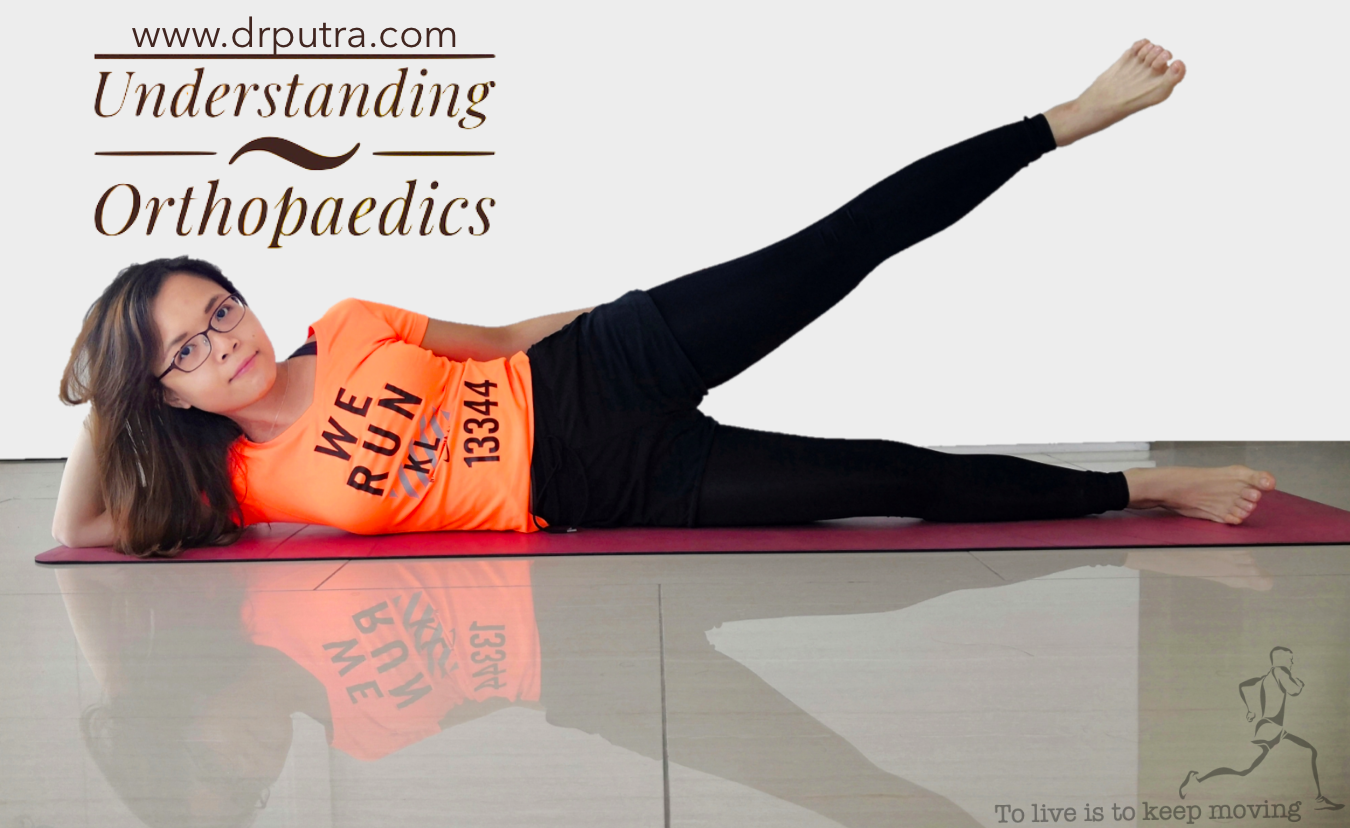
Repeat this 10 times, then turn over and lie on your left side and do the same with your right leg. Aim to do 2-3 sets each day.
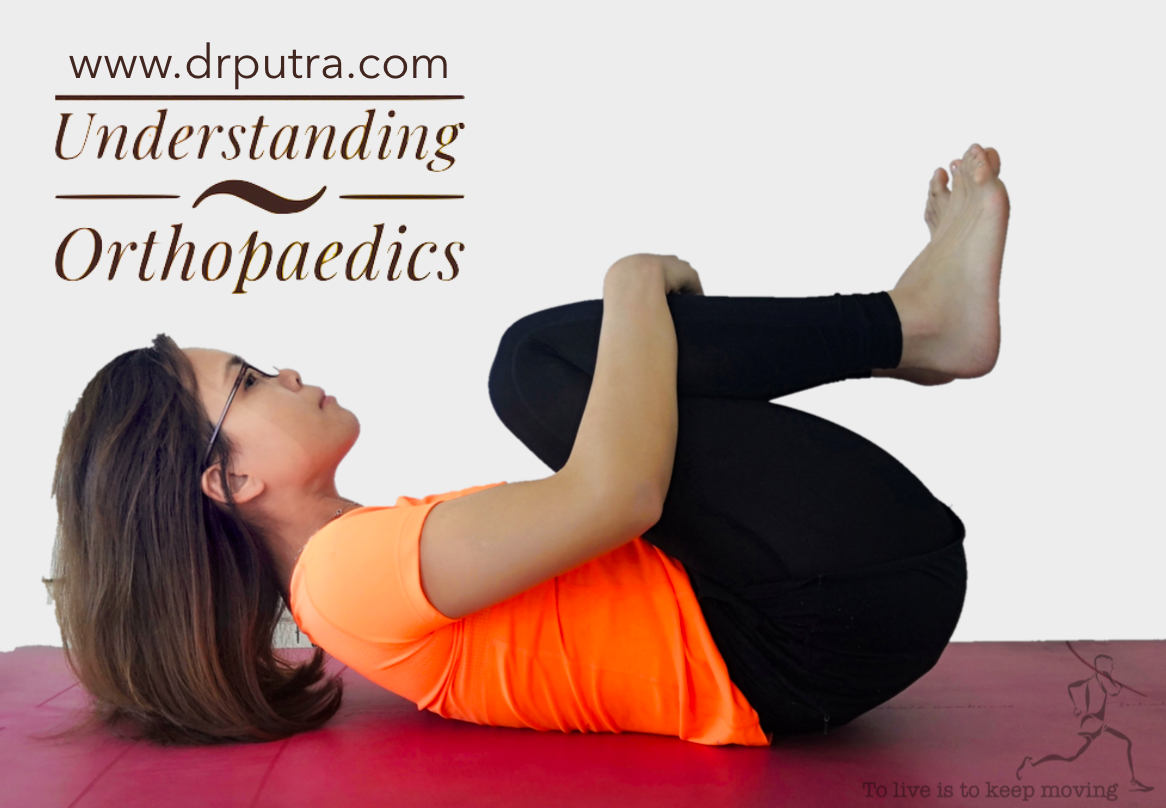
6. Hug Me (Alternatively The Knee to Chest Pose)
Lie on your back on the floor or bed with your knees bent in toward your chest.
Wrap your arms around your legs like in the picture.
Unless you have a cervical spine (neck) problem, gently bring your chin forward towards your knees and hold this position for 20 seconds.
Repeat this stretch 3 times.
7. Push Up the Sky (Alternatively Single Leg Bridge)
Lie on your back with knees bent and your hands at your sides on the floor (or bed).

Straighten your left leg and point it toward the ceiling or sky.
Press your palms to the floor and lift your hips up as high as you can as shown in the picture.
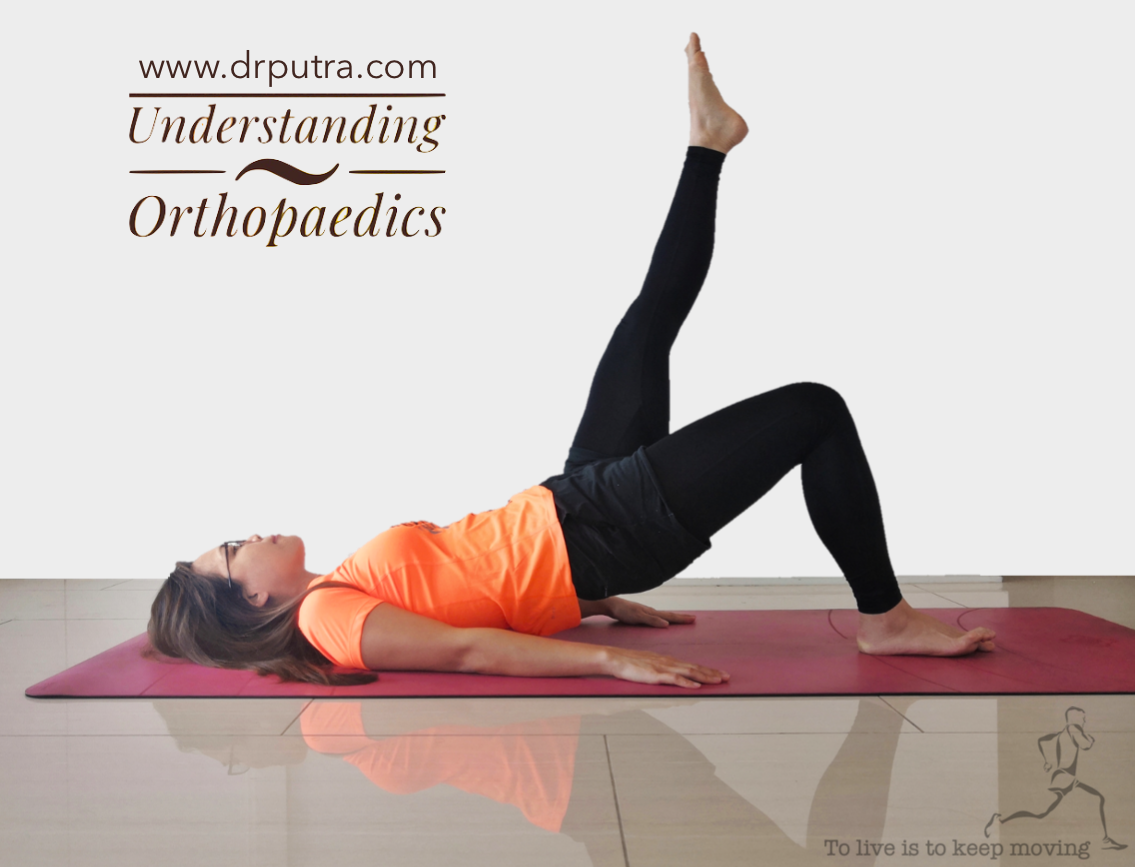
Hold this position for 20 seconds, then return to the starting position and change legs. Aim to do the exercise 3 times with each leg.
8. Rajah Brooke (Alternatively the Butterfly Pose)
Sit straight with your knees bent and the soles of your feet touching as shown in the picture.
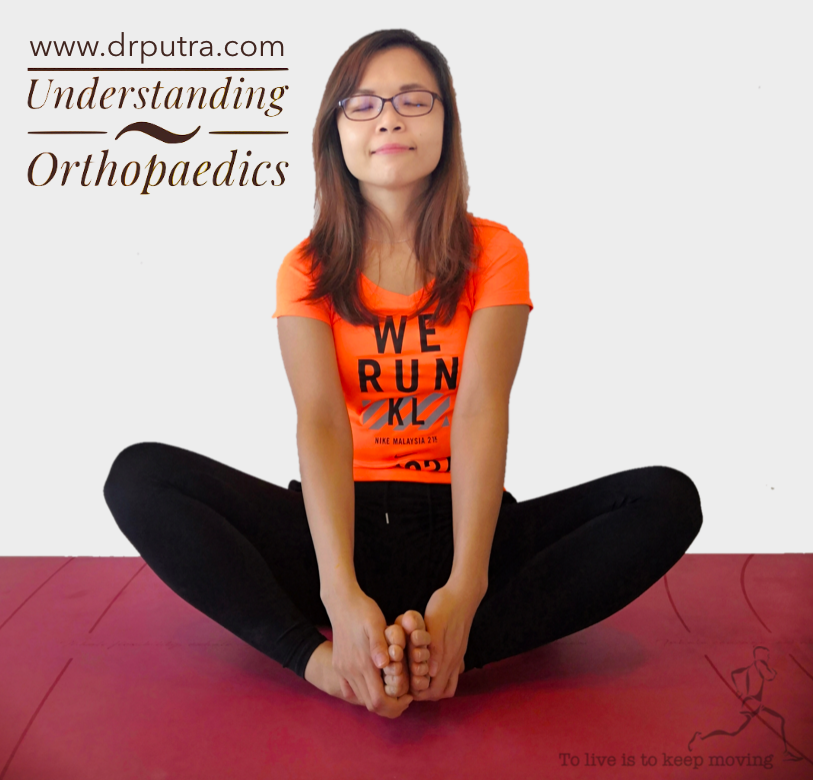
Hold on to your ankles with your fingers. Use your elbows to gently press your knees down toward the floor.

Hold this position for 30 seconds, then bend your body forward as much as you can.
Hold this for another 30 seconds. Aim to do this 2-3 times each day.
Note: If you find this difficult, you can place a pillow under each knee. To make it more challenging, when you bend your knees, bring your heels closer to your body.
9. North, South, East , West (Alternatively the 4-Way Hip Workout)
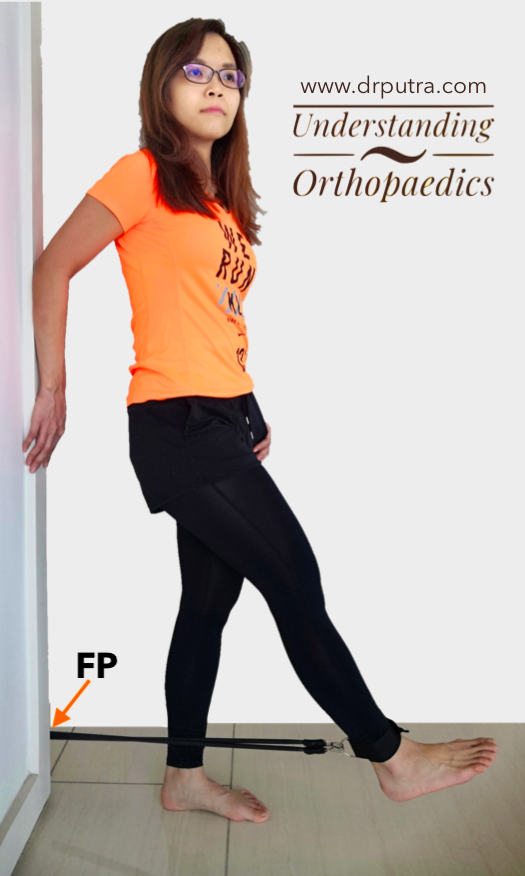
Tie your elastic resistance band to a fixed object a few inches (5-10cm) above floor level (roughly just above the level of your ankles) and strap the other end of the band to your ankle.
Stand straight about a foot (30cm) away from the fixed object you have tied your band to (the Fixed Point – FP) and swing your leg slowly in the direction intended (see below).
North
First turn your body facing AWAY from the Fixed Point (FP) like shown in the picture.
Slowly swing your leg forward as much as you can, keeping your knee straight.
Hold your leg in this position and count to 10. Then bring your leg back to the starting position.
Repeat this 10 times. You should feel a stretch in the muscles behind your hip.
Note: You can hold on to a wall, table or chair to stabilise yourself. If you don’t have a resistance band, just do the exercise without it for now.
South
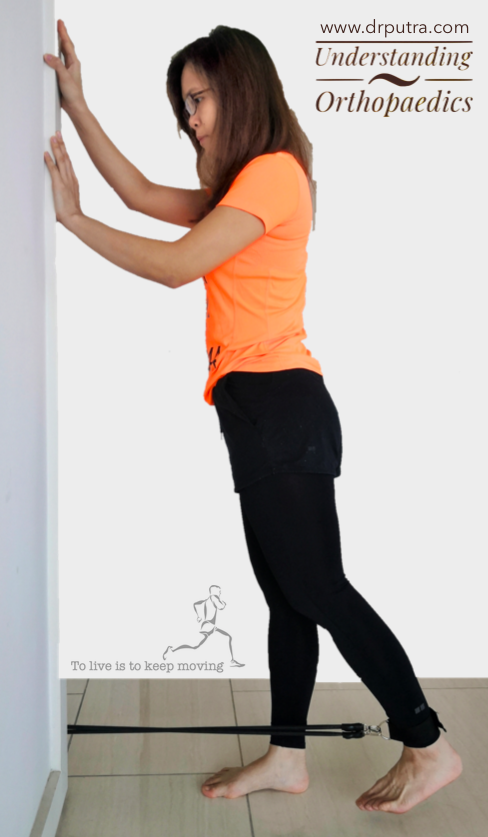
Turn your body facing TOWARD the Fixed Point (FP) like shown in the picture.
Slowly swing your leg backward as much as you can, keeping your knee straight.
Hold your leg in this position and count to 10. Then bring your leg back to the starting position.
Repeat this 10 times. You should feel a stretch in the muscles in front of your hip.
Note: To show the movement clearly, we have strapped the band to the subject’s other leg in this picture, but you can do all directions using your same leg.
East
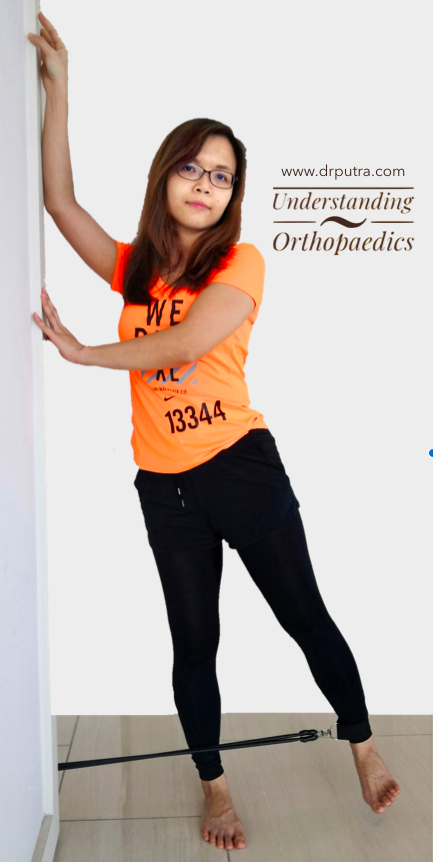
Stand with your body turned 90 degrees to the Fixed Point (FP) as shown in the picture.
Slowly swing your leg outward (this is called hip abduction) as much as you can, keeping your knee straight.
Hold your leg in this position and count to 10. Then bring your leg back to the starting position.
Repeat this 10 times. You should feel a stretch in the muscles on the outer side of your hip. (these muscles are the hip abductors)
Note: If you thought abduction sounds like alien abductions, you are right. Abduction is when something is taken away… in this case your leg moves away from the centre of your body.
West
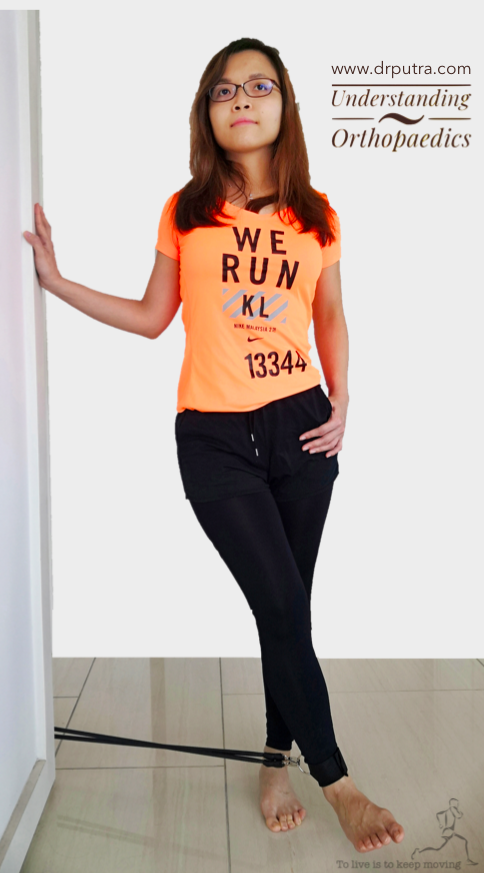
Stand with your body turned 90 degrees to the Fixed Point (FP) as shown in the picture.
Slowly swing your leg across your body as shown (toward your opposite side) like you are closing your thighs together (this is called hip ADDuction).
Hold your leg in this position and count to 10. Then bring your leg back to the starting position.
Repeat this 10 times. You should feel a stretch in the muscles on the innerside of your hip. (these muscles are the hip ADDuctors)
.
And that’s a wrap!
A big thank you to Dr Yvonne Chuon, Consultant Lifestyle Medicine Physician at Quill Orthopaedic Specialist Centre for graciously demonstrating these simple Hip Strengthening Exercises.
Many chronic bone and joint problems are indirectly caused by poor habits and being overweight. My job as an orthopaedic surgeon is made easier by my patients improving their lifestyles to reduce the load … and wear and tear on their joints. So, thank you, Dr Yvonne!
Are you a happy patient?
While I do my best to provide cutting-edge orthopaedic surgical care, I firmly believe that God heals – I’m just here to help you on your body’s journey to recovery.
If you are happy with how you have recovered, or if this website helped you, feel free to leave a note about your own journey here (Google Reviews):
